Tuesday, October 6, 2009

We're on the Rocky Road!


Just a quick one! Here's a photo of our family's rocky road. I think that everyone has their own version and this one is ours. It's very simple and I'm happy to share it with you.

Our Rocky Road.

1 large block of Whittakers Coconut chocolate (if you can't get this then a large block of milk chocolate and some dessicated coconut will do)
1 small block of dark/plain chocolate
mini marshmallows
red jelly frogs, chopped!
scotch finger biscuits, crushed
sprinkles of any colour for the top.

Line a tin with cling film. Melt the chocolates in a large bowl over a pan of boiling water and when runny add the other ingredients. Keep adding while the ingredients are able to be well coated with chocolate. Tip into the prepared tray and add the sprinkles. Put into the fridge to harden and then chop into chunks. It may last long enough to be put into a tin but that doesn't happen here!

Monday, October 5, 2009

Another Birthday Cake!


Now, I'm really proud of this one! And what's more it was easy peasy. I can't take credit for the idea as I nabbed it from over at The Pantry where there was a discussion over decorating a birthday cake for a 21st birthday. The cake recipe came from August's Australian Good Food magazine and the chocolates from Darrell Lee, if I'd been back in UK it would have been Thorntons!
Anyway, here's what I did:

Easiest Ever Chocolate fudge cake

225g self-raising flour
50g cocoa
1 1/2 tsp baking powder
275g brown sugar
250g soft butter
4 eggs
1 1/2 tsp vanilla extract
75g melted dark chocolate

Fudge icing
200g soft butter
200g pure icing sugar
200g melted dark chocolate

Preheat the oven to 180c or 160c fan. Grease and line 2 20cm round sandwich pans
Place flour, cocoa, baking powder, sugar, butter, eggs, vanilla extract and melted dark chocolate in a food processor and process until smooth. If the batter is a little stiff, add 2-3 tbsp water and process again.
Divide mixture equally between prepared pans, smooth surface and bake for 35-40 mins, until a skewer inserted comes out clean. Cool cakes in pans for 5 mins, then turn out onto a wire rack to cool completely.
To make the icing, place butter and icing sugar in a clean processor and process until combined. Add melted chocolate and process until smooth. Sandwich together layers of cake with half of icing and top with remaining icing.

I put the batter in a single cake pan rather that having 2 halves and used half of the fudge icing to cover the cake. I used a couple of boxes of mint sticks which I cut in half and stuck round the edge. They didn't need holding up with the gold ribbon but it was there just in case! Then I just put most of the contents of a box of Darrell Lee chocolates over the top, adding some of their foil covered 'Pick and Mix' to add a bit of glamorous colour!
OH, whose birthday it is feels very special and now we're just drooling away until it's the actual day and we can eat it!

Yoo hoo! I'm back!!


I couldn't bear to repeat myself by asking where does time go to but it's scary to find out that my last post was back in May. Well, as John Lennon said "Life is what happens when you're busy making plans." or something very similar. Since my last post I've been offered a new job and am in the process of taking it up so on my previous performance I'd say that the next post after this will be at Christmas!


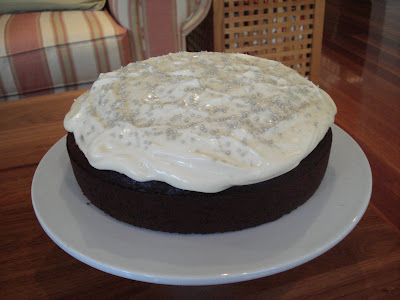
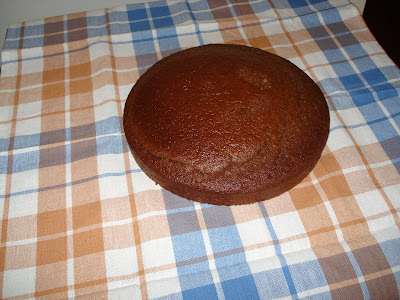
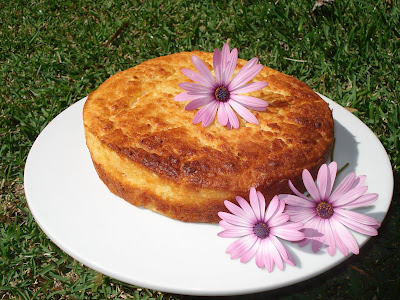
Anyway, how do I do justice to this unpreposessing slice of cake? It may not look much but it is so yummy that I could have another slice before I finish telling you about it. Looking through my books this morning I came across this Sticky Date Cake in Delia's Cookery course. Having nearly all the ingredients I thought I'd have a go and I'm so glad that I did. This is one wonderful cake. The recipe is below and then I'll tell you the bits I changed!


Sticky Date Cake
Ingredients


• 225g (8oz) stoned dates, roughly chopped


• 110g (4oz) raisins


• 175g (6oz) sultanas


• 110g (4oz) currants


• 275g (10oz) butter


• 275ml (10 fl oz) water


• 1 x 400g (14oz) tin condensed milk


• 150g (5oz) plain flour


• 150g (5oz) wholemeal flour


• 3/4 level teaspoon bicarbonate of soda


• 1 generous tablespoon chunky marmalade


• A pinch of salt


• You will also need a 20cm (8in) square cake tin, greased and lined with baking parchment.


Preheat the oven to 170C, 325F, gas mark 3.


• Method


• Begin by placing all the fruit in a largish saucepan (it needs to be large, because the mixture splutters a lot), then add the butter, condensed milk and water and bring everything up to the boil, stirring frequently with a wooden spoon to prevent the mixture sticking. Now turn the heat down to low and simmer for exactly 3 minutes, stirring now and then. After 3 minutes, transfer the mixture to a large mixing bowl and let it cool down for approximately 30 minutes. While it's cooling, weigh out the flours and sift them into a bowl with a pinch of salt and the bicarbonate of soda. When sieving wholemeal flour you frequently find small quantities of bran left in the sieve: these can be tipped on to the already-sieved flour.


• When the fruit mixture has cooled, stir in the flour, salt and bicarbonate of soda using a large metal spoon, then add the marmalade. Now spoon the mixture into the prepared tin and, because this cake does get rather brown on top if not protected, you should cover it with a double square greaseproof paper with a hole the size of a 50p piece in the centre. Then pop it on to the centre shelf of the oven and bake for 2-21/2hours.


• After removing the cake from the oven, let it cool in the tin for 10 minutes before turning it out on to a wire rack. This is quite a large cake that will keep well for several weeks in an airtight tin and even improves with keeping. If you prefer, you could make this in two 450g (1 lb) loaf tins and halve the cooking time.


It really is so simple and the things that I did differently were to replace the chunky marmalade with ginger marmalade and use mixed fruit instead of weighing out all the others.









Saturday, May 23, 2009

Doesn't Time Fly?

I can't believe that it's a year since I started blogging but when I look back I began with Teenboy's birthday cake and here is this year's offering. Actually, I'm a bit late as the cake has been and gone so I can confidently say that it was a success!

I did have a long hard think as to what cake would go down well with a 16 year old and he was too busy with living to give a great deal of thought to it so I went with a recipe that I've been wanting to try, Nigella's Chocolate Guinness cake!

I just love the thought of chocolate and guinness together and the frosting on top makes it sound wonderful. It is also so easy to make which gives it the big thumbs up around here. If you haven't tried it do give it a go and don't worry if you haven't got easy access to guinness as I just used a Tasmanian stout which tasted pretty good! If you have a copy of Nigella's Feast you'll find the recipe there!


250 ml Guinness
250 g unsalted butter
75 g cocoa
400 g caster sugar
142 ml sour cream
2 eggs

1t tbsp real vanilla extract
275 g plain flour
2 1/2 tsp bicarbonate of soda
For the icing:
300 g Philadelphia cream cheese

150 g icing sugar
125 ml double or whipping cream
Instructions:
Preheat the oven to gas mark 4 / 180oc, butter and line a 23 cm springform tin
Pour the Guinness into a large wide saucepan, add the butter gradually, and heat until the butter has melted. At which time, whisk in the cocoa and sugar.
Beat the sour cream with the eggs and vanilla and pour into the brown, buttery, beery pan and finally whisk in the bicarb and flour.
Pour the cake batter into the greased, lined tin and bake for 45 minutes to an hour. Leave to cool completely in the tin on a cooling rack as it is quite a damp cake.
Lightly whip the cream cheese until smooth, sieve over the icing sugar, then beat together. Add the cream and beat again until it makes a spreadable consistency. Ice the top of the black cake so that it resembles the frothy top of a pint.

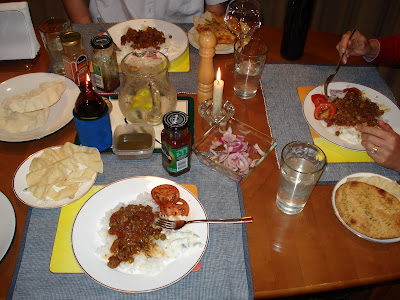
Things have changed such a lot since I started this blog. I'm no longer a student but am working in community services as a family counsellor and loving it. However, it does mean that time is a little more hard to come by and Tuesday nights are a rush to finish work, get home, feed everybody, make next day's lunches and then get out to orchestra practice so imagine my delight when OH came home early and got this gastronomic feast ready for us all! He invented the curry recipe but I know that it contained Patak's Madras paste. The raita was his own and very delicious. I'm hoping that Tuesday nights will become a regular cooking feature for him!!

Sunday, May 17, 2009

More Hearth Warming!

The gingerbread and wedges have disappeared and the tin is looking rather empty. The weather is still cool at night but we are having lovely autumn daytime temperatures with loads of sun. Well, that's the weather update! Now to refilling that tin!
Way back in February I got the yearning to do some yeast cookery and rootled around for a Chelsea bun or Lardy Cake recipe. However, when I came across this I knew that I just had to have a go. These are gorgeous, sticky, spicy and yummy so well worth repeating and they do fill the house with the most delicious aroma! May I present my
Swedish Cinnamon Rolls
50g melted butter
300ml warm milk
1 egg
1 tablespoon sugar
1/2 teaspoon salt
85g custard powder
500g strong flour
1pack/ 1 teaspoon dried yeast (7g)
150g brown sugar
2 heaped teaspoons cinnamon
50g room temp butter
50g Philly cheese
15g butter
100g icing sugar
1 tsp vanilla essence
A squeeze lemon juice
If your flour is cold put it in a bowl and either warm in the oven or give it a few seconds in the microwave. Then add the sugar, salt, custard powder and yeast and mix well together. In a jug mix together the melted butter, egg and milk and add to the dry ingredients. Knead until smooth and elastic. This is a really good way to burn the calories that you will take in from eating the buns or you could do it all in your mixer if you have a dough hook!
Cover the bowl with cling film or a damp tea towel and leave to rise in a warm place for 10-20 minutes.
Meanwhile mix together the brown sugar and cinnamon. You could also add sultanas or raisins if you liked.
Knock back the dough and roll into a rectangle. Dot the dough with the softened butter and then sprinkle the sugar/cinnamon mix over. Roll the dough up into one long roll and seal the edges with a little milk. Don't roll the dough too tightly or the buns will pop up in their middles!
With a sharp knife, cut the roll into about 12 buns. They should be about 1 1/2 inches thick. Place in a lined tin (I use my roasting tin) so they are not quite touching and leave to rise for about an hour. They should now be doubled in size and just touching.
Bake for 15-20 mins at 180 degrees C until light golden brown and when you knock the bottom of the tin it sounds hollow.
To make the frosting beat together the Philly cheese, 15g butter, vanilla essence and lemon juice and then add the sieved icing sugar. Pour over the buns before they cool.
These are great with a cup of coffee or for a huge sugar hit, try hot chocolate!!
This should keep the wolf from the door while I get on with Teen Boys birthday cake!

Sunday, May 10, 2009

Baking warms the home....


....and the hearts! It's turned into a really cold Autumn here or I'm really becoming 'Aussiefied' and finding temperatures that I once would have thought nothing of now shiveringly cold. Anyway, the coolness is a really good excuse to spend time in the kitchen baking and of course, warming the house!

This week I've used 2 recipes, one new and the other familiar but both had the house smelling wonderful. The new recipe is for a very dark and sticky gingerbread and comes all the way from Scotland from Rita who spends some of her time on Violet's Pantry, the foodie forum where I also hang out. This recipe is from her mother and is so easy that I love it! The gingerbread turns all glossy and sticky overnight and I have the feeling that it won't last long!

Very Dark and Sticky Gingerbread

Melt the following ingredients-: 1/2 pint of milk 5ozs dark soft brown sugar 2tbsp treacle 2tbsp syrup 4ozs butter/marg

Cool until barely warm then add

2 beaten eggs and then

1/2lb S.R Flour 1/2 teasp bicarb. soda 1tbsp each ginger, cinnamon, and mixed spice and a pinch of salt.

This makes one 2lb and one 1lb loaf, line the tins.

Bake for 75 mins @ gas 4/ 180c / 350f

This is even better if you can resist cutting it for a day or two.


Now, these Mincemeat Wedges are absolutely wonderful and hit the mark when I fancy a mince pie but don't want to be making pastry. I got the recipe from Maria, who is one half of the inspiration behind Sweet and Simple Bakes, the monthly baking challenge that I try to join in with. If you want to find inspiration for loads of lovely bakes then do go to her blog, the link is up on the right hand side, just look for The Goddess's Kitchen. It's a wonderful place to go and drool too!
Mincemeat Wedges
Makes 12
Ingredients
225g/8oz/2 cups self-raising wholemeal flour
75g/3oz/6 tbsp unsalted butter, diced
75g/3oz/⅓ Demerara sugar
1 egg, beaten
115g/4oz/ ⅓ cup good quality mincemeat
6oml/4 tbsp milk
crushed brown or white sugar cubes or a mixture, for sprinkling
Preheat the oven to 200oC/400oF/Gas 6. Line the base of a 20cm/8in round sandwich tin and lightly grease the sides. Put the flour in a bowl, add the diced butter and rub in with your fingertips just until the mixture resembles coarse breadcrumbs.Stir in the Demerara sugar, egg and mincemeat. Add enough milk to mix to a soft dough. Spread evenly in the prepared tin and sprinkle generously with the crushed sugar. Bake for about 20 minutes until firm and golden. Cool in the tin, then cut into wedges to serve.
The smell in the house is almost festive and has me really looking forward to the long weekend that we're taking the kids on in July when we hope to do Christmas in July in a fantastic mountain lodge at Turon Gates, but I'm sure you'll hear more of that as time goes on!

Monday, March 30, 2009

Choc-chip Oat Cookies

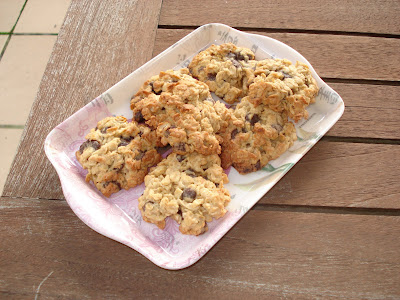
Well, here's my offering for the Sweet and Simple Bakes challenge this month! Please click on the link on the right and look at all the other entries and grab the recipe too. These were lovely cookies and the mixture makes loads so there are plenty for hungry soccer teams and lunch boxes. They are really simple to make and although mine look much more 'rustic' that the challenge photo, it didn't stop them from being eaten!
I thought that the recipe seemed a bit familiar to me and as I was browsing through my copy of The Chocolate and Coffee Bible I came across the recipe but they were called biscuits and looked much rounder, flatter and crisper! Ah well! Anyway, the good thing about browsing 'The Bible" is I've discovered a load of new recipes to try especially in the pudding section and as we're moving into cooler times here I'm sure that they'll be welcome!

Monday, March 23, 2009

Lemon Ricotta Cake


O my goodness, this is so lovely, even if I do say so myself. Over at 'The Pantry' I've been hearing loads about ricotta cakes and reading about clever members who have even been making their own ricotta! Well, I do have to say that ricotta has rather passed me by until this weekend but will now be on the list. Why did I wait for so long?

This months BBC Australian Good Food magazine (Christmas subscription gift from Mum, Thanks Mum!) has a very simple Lemon Ricotta Cake recipe which inspired me to try it. It is so easy to make and I have to say that we didn't wait for it to completely cool before slicing it up and serving with a lovely dollop of sour cream. This is a keeper!

Lemon Ricotta Cake

1 cup (150g) self-raising flour

1 tsp baking powder

175g room temp butter

3/4 cup(165g) caster sugar plus 2 tbsp extra

grated rind and juice of 2 lemons

3 eggs, separated

11/4 cups(250g) ricotta

Preheat the oven to 180C or 160C fan. Grease and line a 19cm springform cake pan. Sift flour and baking powder into a bowl and set aside. Cream butter and gradually beat in sugar until light and fluffy. beat in lemon rind,egg yolks and ricotta. In a separate bowl, whisk the eggwhites until firm peaks form and then fold into the ricotta mixture. Fold in the sifted flour and half the lemon juice. Spoon the mixture into the cake pan and bake for an hour until risen and golden and a skewer comes out clean. Combine the remaining lemon juice with the extra sugar and heat to make a syrup, then drizzle over the hot cake. leave to cool in the pan for 1 hour and then transfer to a wire rack to completely cool.

This is so lovely and I'm looking forward to trying it with other citrussy combinations.

Sunday, March 8, 2009

Super Soup!

I must say that I'm loving the new school year. Teen Boy is starting his HSC (Higher School Cert) and Little One is no longer so little as she's just started Year 7. So why am I loving it? Well, they're so into their homework that I have a whole load of free time to spend rattling the pans in the kitchen. Yesterday was no exception and from out of the oven came Nigella's Store cupboard Chocolate cake, Maria's Mincemeat wedges (http://thegoddesskitchen.blogspot.com/), Sal's Impossible Quiche (see below!) and from the stove top, a rather lovely cupboard soup plus the remaining green beans from the garden which got many accolades at lunch. The family have begged me not to forget this one so I'm putting it here for posterity!

Saturday Cupboard Soup

1 onion, finely chopped

1 tin creamed corn

1 tin canellini beans, drained

A handful of green beans, chopped

1 chicken stock cube

1 vegetable stock cube

five spice powder


Fry the onion in a little oil until translucent. Add the tin of creamed corn and 1 tins worth of water. Crumble in the stock cubes and add the green beans. Then add the canellini beans and a sprinkle of five spice powder. Bring to the boil and simmer until the green beans are tender. Adjust the seasoning and serve!

I'm sorry but there are no photos, the homework included a science project on digital cameras. However, here's one I did earlier!! My find in the sands at Uluru!


Saturday, February 21, 2009

Gluten free, dairy free and sugar free!

I set myself a challenge the other week after finding out that a friend at work has a very strict diet. It was a birthday lunch and she had brought in the cake (from a well known bakers). Everyone was tucking in except for her. She was nibbling sunflower seeds. Now, I'm partial to the odd sunflower seed too but for a birthday celebration????! On asking, I found out that her diet has to be gluten, dairy and sugar free so cakes are out of the question. Knowing that I was on the birthday cake rota next I was determined to find a way around this so I called on the worldwide expertise of Violet's Pantry, the forum filled with all my cookery gurus....and this was the answer!
Gayle recommended this recipe from Rose Elliot's Low Fat, Low Sugar.
Lemon Muffins:
1/2 Butternut squash
100g rice flour
1/2 tsp bicarb of soda
Grated rind of one lemon
1 egg white
150ml soya or rice milk
1tsp lemon juice
1tsp vanilla extract
Preheat oven to gas mark 6 200c/400f Remove the seeds from the squash and put cut side down onto a baking tray and bake for 45-60 mins. Cool and scoop the flesh away and mash. Leave to cool. Put the flour, bicarb and lemon rind into a bowl and mix together. Whisk the egg white, soya milk, lemon juice and vanilla and add to the dry ingredients along with the butternut squash. Mix quickly to a smooth, thick consistency and put large tablespoonfuls into paper cases. Bake for 20-25 minutes until firm in middle.

I left out the lemon and added a teaspoon of vanilla bean paste in addition to the teaspoon of vanilla essence. I was pleased with how they looked after they'd been cooked but felt that they tasted a little bland and that the lemon would be good. I longed to sprinkle a little icing sugar over them but that would have defeated the object!! However, they went down really well when I took them in which made it all worthwhile.

Sunday, February 15, 2009

Impossible??? Quiche???

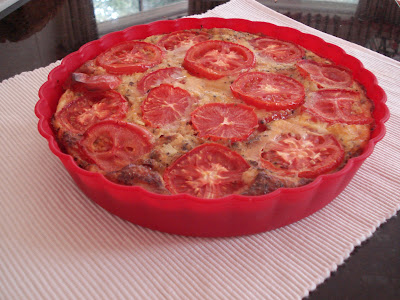
Doesn't this look lovely? I've been meaning to try out this recipe for ages and at last have got round to doing it. The recipe comes from a forum friend and fellow blogger called Sal. If you've a moment then click on the link on the right for Pink Bytes and you'll see her blog!
This is her Impossible Quiche which is actually not impossible but very easy. The secret is that all the ingredients go into a screwtop jar (or any watertight container) and are then shaken up. How easy is that?
It's not a true quiche in that there is no pastry case but I could certainly turn this out and slice it up to serve on plates with a salad.
It's a great recipe for the kids to try and the variations are as many as you could possible want or imagine so if you haven't tried it before then please give it a try.
Impossible Quiche.
4 eggs.
1 1/2 cups milk.
1 tablesp. softened butter.
2/3 cup S.R. flour.
1 cup grated cheddar.
1 sliced onion.
1/2 chopped capsicum.
1 grated courgette.
1 cup salmon, ham, chicken or bacon.
Beat together the eggs and milk, then put in all other ingreds. Put into air tight container and shake, SHAKE. But only for a short while, say 30 secs. Put into a well greased Quiche dish, sprinkle with Chives or cracked pepper, and bake in oven set at 180c for 35-45 mins. Eat hot or cold with a nice crisp salad. Enjoy.
The version I made used a medium tin of tuna, sweetcorn and onion with a couple of sliced tomatoes on the top. This is definately a keeper! Thanks Sal!!

Saturday, January 31, 2009

Banana and Chocolate Bread.

The challenge for this month on Sweet and Simple Bakes is this lovely Banana Chocolate Bread. Banana bread always goes down well in this house and is a great and welcome addition to lunch boxes. I usually use a recipe of Delia's but it was lovely to try a new one. We loved the hint of lemon from the lemon rind (I didn't have a spare orange!) and who could possibly complain about chocolate chips?
Banana and Chocolate Bread
Serves 10-12
Ingredients
250g (9oz) self-raising flour
Pinch of salt
1 tsp baking powder
150g (5oz) caster sugar
100g (3 ½ oz) butter, softened
2 eggs
1 tsp vanilla extract
Finely grated zest of 1 orange
475g (17oz) whole bananas (about 4 small ones), peeled
75g (3oz) dark chocolate chips
13 x 23cm (5x9in) loaf tin
Preheat the oven to 170oC (325oF), Gas mark 3. Lightly butter and line the loaf tin with parchment paper. Sift the flour, salt and baking powder into a large bowl. Add the sugar and butter and, using your fingertips, rub it in until the mixture resembles coarse breadcrumbs. Whisk the eggs, vanilla extract and orange zest in another bowl. Add the bananas and mash very well with a potato masher. Add the chocolate chips. Make a well in the centre of the dry ingredients and pour in the banana mixture. Gently but thoroughly bring all the ingredients together with a wooden spoon, then pour into the prepared loaf tin. Smooth the top and bake in the oven for 1-1 ¼ hours or until a skewer inserted into the middle comes out clean. Allow to cool for 5 minutes before removing the cake from the tin and leave to cool on a wire rack.
Please click on the link on the right and look at the Chocolate and Banana Breads worldwide and if it looks like good fun to you then join in with the next challenge!

When the boat comes in!!


I love to dream of fish fresh from the sea and the other day my dream came true! OH and Teenboy went on a fishing expedition before the new school year begins and came home with this catch. Now usually our fishing results in lots of well fed fish in the sea and a very empty frying pan but not this time. OH was so pleased with the catch that he cleaned and barbequed them for dinner.

The top fish is a taylor, a predatory fish which has very sharp teeth but makes good eating. The lower fish is a Maori wrasse which is lovely to look at and just as good to eat.

These were simply moistened with a bit of olive oil and a splash of lemon juice, walloped on the barbeque then served with potato salad and fresh sweet corn. It doesn't get much better than that!

Sunday, January 25, 2009

A Blast of Protein!

My OH has taken up his training again using the multi-gym we have in the garage. As a result he's needing to increase the amount of protein that he eats. I've been busy looking for different sources rather than just meat or eggs and remembered my flirting with quinoa last year. I quite liked the porridge but felt that OH would prefer something a little more savoury. After researching on 'the net' I came up with this idea of a 'sort of risotto'.
Savoury Quinoa Risotto-thingy!
1 tablespoon olive oil
1 onion, finely chopped
1 garlic clove, finely chopped
1 cup quinoa
2 cups veg or chicken stock
1 tablespoon tomato paste
1 cup mixed veg
3 tomatoes, chopped
3 pieces of sundried tomatoes, chopped
25g grated cheese
Method
Heat the oil in a pan and gently fry the onion and garlic until translucent. Add the quinoa, stock and tomato paste and bring to the boil. Simmer for about 10 minutes and then add the mixed veg. Simmer for another 5 minutes or until the quinoa is cooked. Stir in both sorts of tomato and the cheese and gently heat through. Season to taste and serve.
It all went down well and next time I'm going to play around with the veggie mix as I think that a bit of celery and courgette would go well too. So, a bit of a success if I do say so myself and I'm definately going to be looking for more things to do with quinoa!

Sunday, January 18, 2009

An Aussie Greek Salad!


This has been a most relaxing weekend! Since June last year we seem to have had visitors non stop! Not that I'm complaining! When you live on the other side of the world to your family and friends it's nice to know that you're not a case of 'out of sight, out of mind'. However I can't deny the feeling of peace that has descended over the house since the last of the visitors left for the airport and the calendar is still empty of visitors for the coming year.

Once all the domestics had been done it was time to turn my attention to the very neglected veggie patch and what did I find? The makings of a very tasty Greek salad. The courgette plants that I put in turned out to be cucumber plants and they were quietly producing away in the corner. I'm not sure what variety they are but rather hope they are the ones rejoicing in the name of 'Burpless'! The Roma tomatoes were also doing a grand job despite weeks of neglect and the beefy tomatoes are hanging off the plants too.

Having picked the produce, washed and chopped it along with half a red onion I drizzled the salad with some local olive oil from the Hunter Valley and added feta cheese. The crusty bread comes from a brilliant patisserie called Pierre's in Turramurra and there we have lunch!

Now all I need to do is think of 6 ways to use up the 6 red cabbages that are waiting to be picked!